There are a few different ways to do this, but I never found a clear article detailing the process so I’ve decided to compile one so that you do not have to suffer like I did.
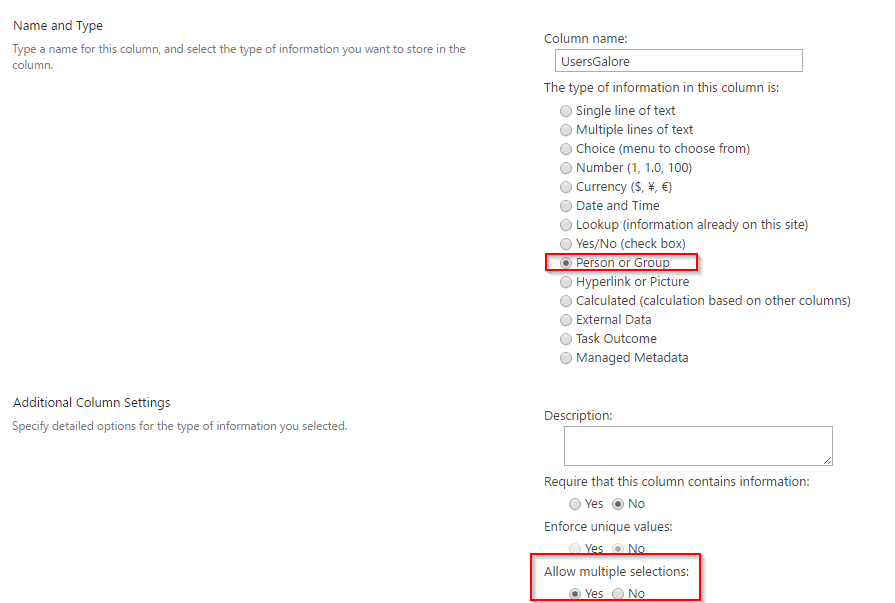
First off, you’ll need a list with a person or group column that accepts multiple values.

Create a new SharePoint App using either Visual Studio or Napa. Create a page and place the client-side people picker on it. Microsoft do a surprisingly good job is explaining how to get this up and running here.
Add a button to the page too. This is what my PlaceHolderMain looks like:
<SharePoint:ScriptLink Name="clienttemplates.js" runat="server" LoadAfterUI="true" Localizable="false" />
<SharePoint:ScriptLink Name="clientforms.js" runat="server" LoadAfterUI="true" Localizable="false" />
<SharePoint:ScriptLink Name="clientpeoplepicker.js" runat="server" LoadAfterUI="true" Localizable="false" />
<SharePoint:ScriptLink Name="autofill.js" runat="server" LoadAfterUI="true" Localizable="false" />
<SharePoint:ScriptLink Name="sp.js" runat="server" LoadAfterUI="true" Localizable="false" />
<SharePoint:ScriptLink Name="sp.runtime.js" runat="server" LoadAfterUI="true" Localizable="false" />
<SharePoint:ScriptLink Name="sp.core.js" runat="server" LoadAfterUI="true" Localizable="false" />
<SharePoint:ScriptLink Name="SP.UserProfiles.js" runat="server" LoadAfterUI="true" Localizable="false" />
<WebPartPages:WebPartZone runat="server" FrameType="TitleBarOnly" ID="full" Title="loc:full" />
<h1>Multi User Entry</h1>
<div id="peoplePickerDivExample"></div>
<div style="padding-top:10px;">
<button type="button" onclick="InsertUsers();return false">Submit</button>
</div>
<!-- Gonna use this for output -->
<div id="output">
</div>
</asp:Content>
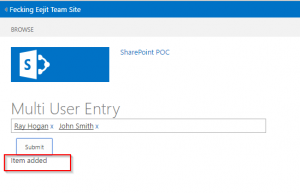
Which renders like so…

At this point the people picker should be able to pull usernames from your SharePoint site.
Add the following JavaScript functions to your App.js file.
var ctx = new SP.ClientContext(appWebUrl);
var appCtxSite = new SP.AppContextSite(ctx, hostWebUrl);
var web = appCtxSite.get_web(); //Get the Web
var oList = web.get_lists().getByTitle('RaysTestList');
var itemCreateInfo = new SP.ListItemCreationInformation();
var oListItem = oList.addItem(itemCreateInfo);
//Get User info
var peoplePicker = SPClientPeoplePicker.SPClientPeoplePickerDict.peoplePickerDivExample_TopSpan;
var users = peoplePicker.GetAllUserInfo();
//Array to store users
var userObjs = [];
var userName = "";
//Cycle through the picker and add them to array
for (var i = 0; i < users.length; i++) {
userName = users[i]["Description"];
userObjs.push(SP.FieldUserValue.fromUser(userName));
}
oListItem.set_item('Title', "Rays Demo");
oListItem.set_item('UsersGalore', userObjs);
oListItem.update();
ctx.load(oListItem);
ctx.executeQueryAsync(Function.createDelegate(this, onQuerySucceeded), Function.createDelegate(this, onQueryFailed));
}
//When the time request succeeds...
function onQuerySucceeded() {
//Success!
$("#output").html("Item added");
}
//When the time request fails...
function onQueryFailed(sender, args) {
//Oops!
$("#output").html("Item failed");
}
And that should be that! Insert your users into the picker and click submit.

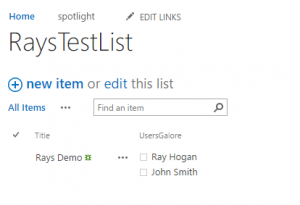
View the list to confirm that the two entries are inserted.

🙂